How to use the Configured Buffer of NG-Trace
We assume that you have correctly installed NG-Trace 2 and the FBox library according to the instructions on the NG-Trace Download page.
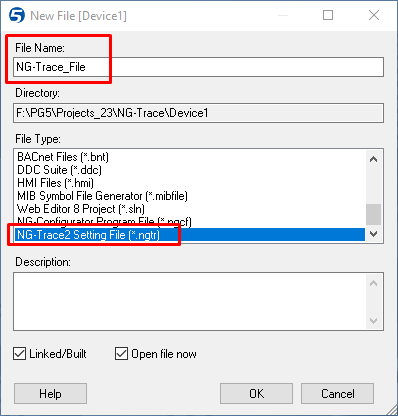
- Create a new file for the PCD device in your PG5 project and select the type ‘NG-Trace’. When opening the file, NG-Trace will start.

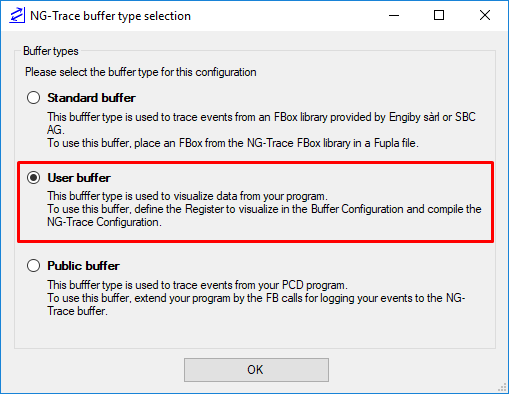
2. Select the “User Buffer” option.

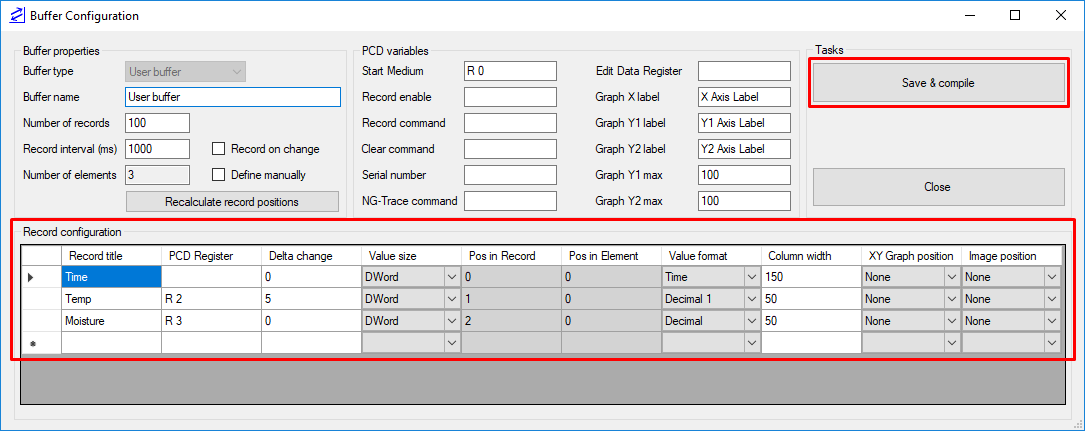
3. Click on the button “Edit Buffer in the “Configuration” area.

4. Specify the registers and flags you want to record in the “Record configuration” area. Then, click on the button “Save & compile”.

5. Build the PG5 project, download it and run the program as usual.
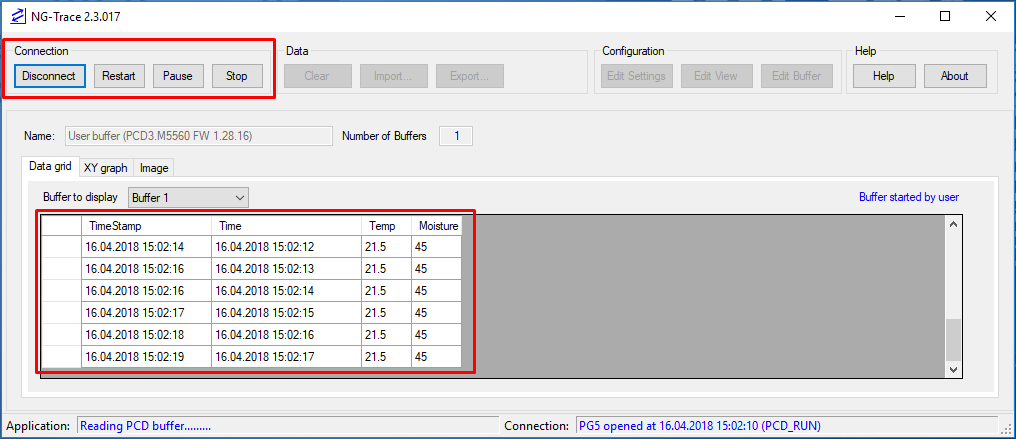
6. Finally, connect to the User Buffer with the NG-Trace 2. The records should appear below.

Read the Help file for more explanation.
